I remember the first time I tried making Homemade Nutter Butter Cookies: the shape looked right, but the centers were too soft and the peanut-butter filling oozed out the sides. This version of Homemade Nutter Butter Cookies fixes those problems by balancing a drier-but-tender cookie dough with a stabilized filling so the sandwich stays neat and keeps its crunch. If you want well-shaped, textured peanut-butter sandwich cookies you can stack and pack, read on—I tested this until the texture was consistent.
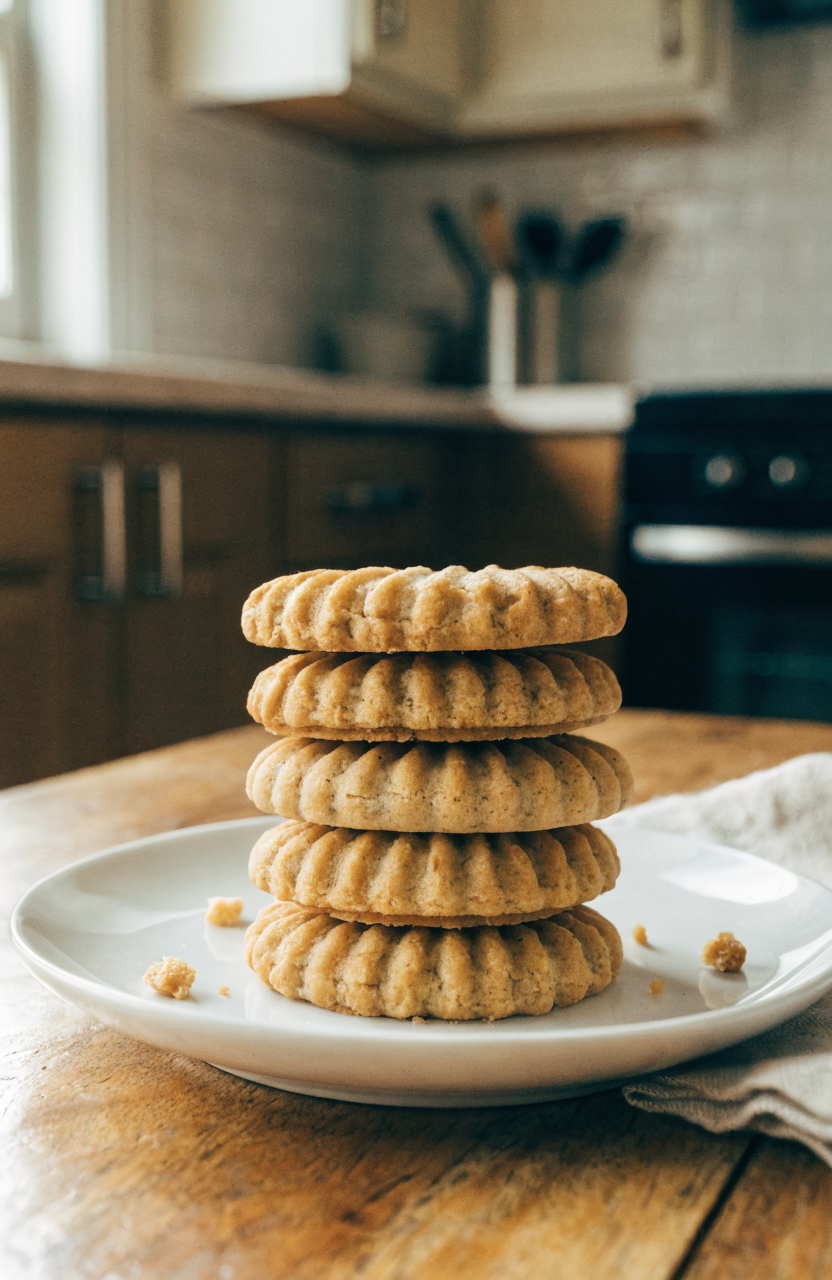
Why this Homemade Nutter Butter Cookies works
The key technique here is matching cookie moisture to filling stability. Typical homemade peanut-butter sandwich cookies either spread too much or stay cakey. I adjusted the fat and sugar ratio and added a short chill so the cookies hold the traditional ridged shape while keeping a slightly tender interior. For the filling I use a cooked sugar buttercream-style approach (just a small change in ratio and a touch of cornstarch) so it stays creamy in the fridge and doesn’t weep into the cookie. During testing I first used only a standard buttercream and the filling started to thin after a day; adding 1 teaspoon cornstarch and reducing the liquid by a tablespoon produced a filling that stays put without tasting gummy. The final method is reliable for batch baking, stacking to transport, and giving the signature crisp edge with a pleasant bite in the center.
Key takeaways
- Crisp edges and slightly tender centers come from the exact balance of brown and granulated sugar plus a brief chill.
- The filling is stabilized with a small amount of cornstarch so it won’t bleed into the cookies.
- Pipe or press cookies in batches to keep consistent shape and texture.
Ingredients you’ll need and what to substitute
I keep the ingredient list short and pantry-friendly. Creamy peanut butter is the obvious choice for the filling and dough; if you prefer a chunkier texture, use chunky peanut butter in the dough but still use creamy for the filling so sandwiches close smoothly. I use part light brown sugar to keep a touch of chew in the center while granulated sugar helps the edges crisp. If you only have dark brown sugar, use it but expect slightly deeper molasses notes and a darker cookie color. For a lower-cost option, store-brand peanut butter and butter work fine; avoid natural-separation peanut butter unless you thoroughly stir it so measurements are consistent—natural styles can make the dough slightly wetter and require a short extra chill. Cornstarch in the filling is the small trick: tapioca starch can substitute but may give a glossier finish. If you need dairy-free, swap butter for a firm plant-based butter and use a dairy-free powdered sugar; texture will be close but slightly less rich.
Equipment
Essential tools are a standard-sized cookie sheet (rimmed sheet pan), a piping bag or small zip-top bag with the corner snipped for the filling, a medium mixing bowl, and a hand or stand mixer for creaming. A fork or a ridged cookie press is optional if you want the classic Nutter Butter surface ridges; I used a fork and a small bench scraper to keep shapes consistent. A wire rack for cooling is also important so cookies don’t steam on the pan and lose crispness.
How to make Homemade Nutter Butter Cookies
Make the cookie dough
Start by preheating the oven to 350°F and line two rimmed sheet pans with parchment. In a medium bowl whisk together 2 1/4 cups all-purpose flour, 1 teaspoon baking soda, 1/2 teaspoon fine salt, and 1/2 teaspoon cornstarch—cornstarch helps a slightly tender center while maintaining structure. In the mixer bowl cream 1/2 cup (1 stick) unsalted butter at room temperature with 3/4 cup packed light brown sugar and 1/4 cup granulated sugar until light and slightly fluffy, about 2–3 minutes. Add 1 large egg and 1 teaspoon vanilla extract and mix until combined. Stir in 1 1/4 cups creamy peanut butter (smooth) until evenly blended. With the mixer on low, add the dry ingredients and beat just until incorporated—don’t overwork the dough. The dough should be soft but scoopable; if it seems too sticky to shape, chill for 10–15 minutes.
Shape and bake
Portion dough by teaspoon or a small cookie scoop (about 1 tablespoon dough) into rounded ovals about 1 1/4 inches wide; place on the prepared pans about 1 1/2 inches apart because they spread slightly. Use the tines of a fork to lightly press shallow ridges in one direction, then rotate 90 degrees for the cross-hatch, or use a small cookie stamp for the classic ridged look. Bake one tray at a time in the preheated 350°F oven for 10–12 minutes. Watch the edges for a golden tone—edges should be set and lightly golden while centers remain slightly soft. Remove to a wire rack and cool completely; cooling is crucial—hot cookies are fragile and will compress, which ruins the ridged texture.
Make the stabilized peanut butter filling
While cookies cool, make the filling so it’s spreadable but stable. In a medium bowl beat 1/2 cup (1 stick) unsalted butter at room temperature until smooth. Add 1/2 cup creamy peanut butter and beat until combined. Gradually add 1 3/4 cups powdered sugar, mixing on low to avoid floury clouds. Add 1 teaspoon vanilla, 2 tablespoons heavy cream, and 1 teaspoon cornstarch; beat on medium-high until light and pipeable. The cornstarch gives body so the filling won’t weep into the cookies—if your filling looks too thick, add up to 1 additional teaspoon of cream; if too thin, add a tablespoon more powdered sugar and a pinch more cornstarch.
Assemble
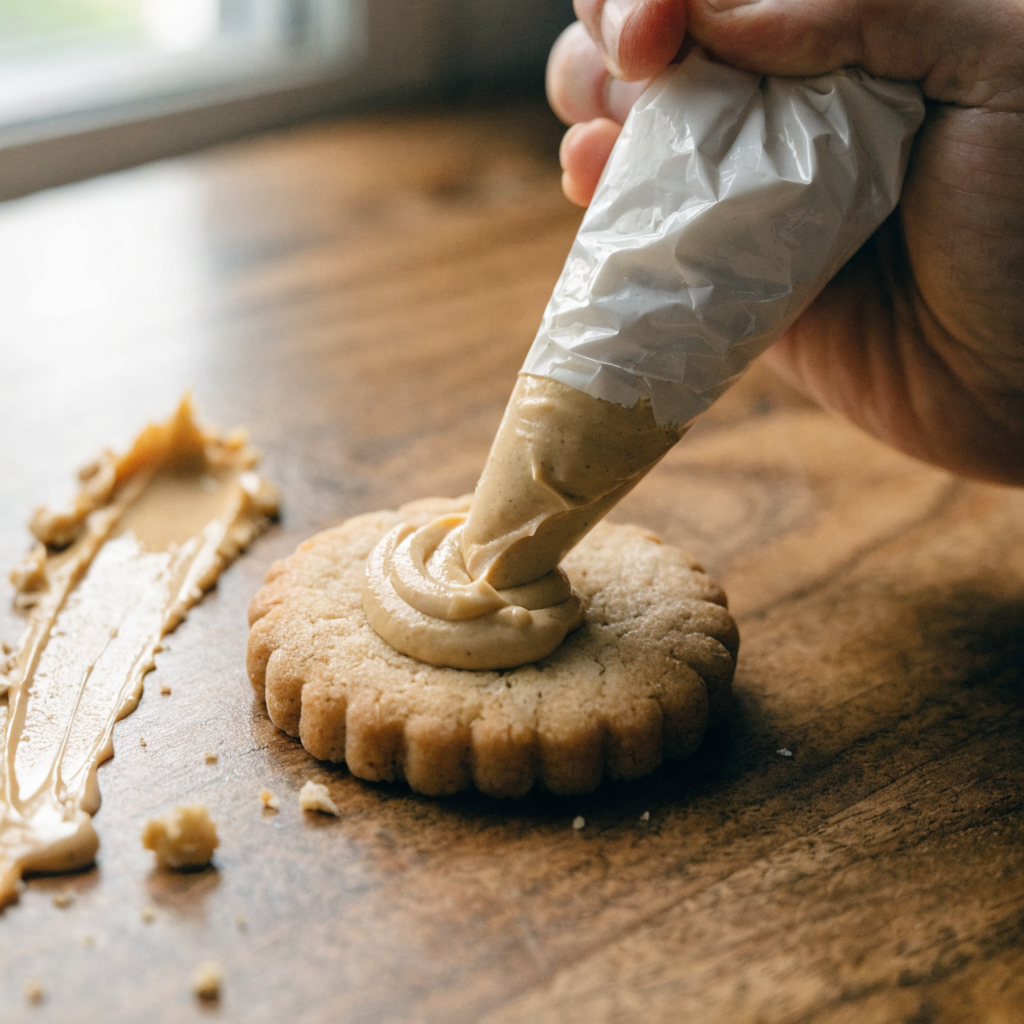
Pair cookies by similar size. Transfer the filling to a piping bag or zip-top bag and pipe about 1 teaspoon of filling onto the flat side of one cookie, then gently press the matching cookie on top to form a sandwich. Don’t press too hard or the filling will squeeze out; a light press is enough. Store assembled cookies on a cooling rack for 10 minutes to let the filling set, then transfer to an airtight container.
Things I learned the hard way
- If the dough is too warm, cookies spread into flat discs; chill 10 minutes before shaping to keep the classic oval shape.
- Using all brown sugar made the cookies overly soft; the mix of brown and granulated sugar gives crisp edges with slightly tender centers.
- First filling was too loose and bled into cookies—adding 1 teaspoon cornstarch fixed the bleed without changing flavor.
- Skipping the wire rack step led to soggy bottoms—always cool on a rack so steam escapes.
- Trying to make large (oversized) sandwiches requires longer bake time and often ends with underbaked centers; stick to the 1-tablespoon dough size for consistent texture.
- My first batch cracked around the ridges—I realized I was pressing too hard with a fork; light, shallow presses preserve the texture.
Variations to try
- Chocolate-dipped: Melt 6 ounces of semi-sweet chocolate and dip half of each assembled sandwich; refrigerate until set. Expect the chocolate to firm quickly—no change to bake time.
- Salted caramel filling: Replace 1 tablespoon cream in the filling with 1 tablespoon caramel sauce and reduce sugar by 1–2 tablespoons to compensate; this yields a softer filling that should be refrigerated before assembling.
- Crunchy peanut-butter centers: Fold 1/4 cup finely chopped roasted peanuts into the filling for a contrast of textures; no timing adjustment required.
- Peanut allergy swap: Use almond butter or sunflower seed butter in both dough and filling and reduce added salt by half if the spread is already salty.
Storage, freezing, and reheating
Store assembled cookies in an airtight container in the refrigerator for up to 7 days; the filling firms slightly in the fridge and the cookies stay structurally sound for packing. For room-temperature serving, remove from the fridge 30 minutes before serving so the filling softens a touch. You can freeze unfilled cookies in a single layer on a tray for 1 hour, then transfer to a freezer-safe bag for up to 3 months; thaw fully and then assemble. Assembled cookies freeze well for up to 1 month—wrap tightly and thaw in the refrigerator overnight. Reheat is not recommended since warmth makes the filling soften and the cookie lose crisp edge; instead let come to room temperature for texture restoration.
What to serve with Homemade Nutter Butter Cookies
These sandwiches pair well with cold milk, a scoop of vanilla ice cream for an ice-cream-sandwich twist, a simple cup of black coffee to cut the sweetness, or a fresh fruit plate for a contrast in acidity. For a themed dessert platter, include simple butter cookies and chocolate-dipped graham crackers to balance textures.

Homemade Nutter Butter Cookies
Ingredients
Equipment
Method
- Preheat the oven to 350°F and line two rimmed sheet pans with parchment paper.
- Whisk together 2 1/4 cups all-purpose flour, 1 teaspoon baking soda, 1/2 teaspoon salt, and 1/2 teaspoon cornstarch in a medium bowl.
- Cream 1/2 cup unsalted butter, 3/4 cup packed light brown sugar, and 1/4 cup granulated sugar until light, about 2–3 minutes, then add 1 large egg and 1 teaspoon vanilla and mix to combine.
- Beat in 1 1/4 cups creamy peanut butter until smooth, then add the dry ingredients on low and mix until just combined; chill 10–15 minutes if dough is sticky.
- Portion dough with a small scoop or by tablespoon into oval mounds about 1 1/4 inches wide and place 1 1/2 inches apart on the prepared pans.
- Lightly press shallow ridges with a fork (or use a small cookie stamp) and bake one tray at a time at 350°F for 10–12 minutes until edges are set and lightly golden.
- Transfer cookies to a wire rack and cool completely before filling.
- Beat 1/2 cup unsalted butter with 1/2 cup creamy peanut butter until smooth, then gradually add 1 3/4 cups powdered sugar on low.
- Add 1 teaspoon vanilla, 2 tablespoons heavy cream, and 1 teaspoon cornstarch and beat until light and pipeable; adjust thickness with up to 1 additional teaspoon cream or a tablespoon more powdered sugar.
- Pair cooled cookies by size and pipe about 1 teaspoon of filling onto the flat side of one cookie, then gently press the matching cookie on top.
- Let assembled sandwiches rest 10 minutes to set, then store in an airtight container in the refrigerator for up to 7 days.
Notes
Frequently asked questions
Can I make the dough ahead? Yes. Dough can be chilled, wrapped, for up to 48 hours; bring to a cool room temperature for 10 minutes before shaping. Chilled dough actually helps hold the shape in the oven.
Can I use natural peanut butter? You can, but natural peanut butter (oil separation) tends to make the dough softer and may require a short extra chill (15–20 minutes) before shaping to avoid spreading. Stir well to recombine oils before measuring.
Why did my cookies go flat? Flat cookies usually mean dough was too warm or the oven temperature was too low. Chill the dough briefly and verify your oven with an oven thermometer—350°F is the target.
Can I freeze the filled sandwiches? You can freeze assembled cookies for up to 1 month; wrap tightly to avoid freezer burn and thaw in the refrigerator to avoid condensation making the cookies soggy.
How do I keep the filling from bleeding into the cookie? The small addition of cornstarch in the filling we use here stabilizes it. Also, make sure cookies are completely cool before assembling so residual warmth doesn’t soften the filling.
Can I double the recipe? Yes—double all ingredients and chill dough in two portions if needed to keep shaping manageable. Baking time remains the same per tray.
Closing
These Homemade Nutter Butter Cookies deliver the crisp-edged, slightly tender sandwich that I wanted from my first attempt—once I added the small filling fix and adjusted the dough ratios, the results became consistent. I hope you find the texture and assembly cues helpful when you make them at home.


Leave a Reply