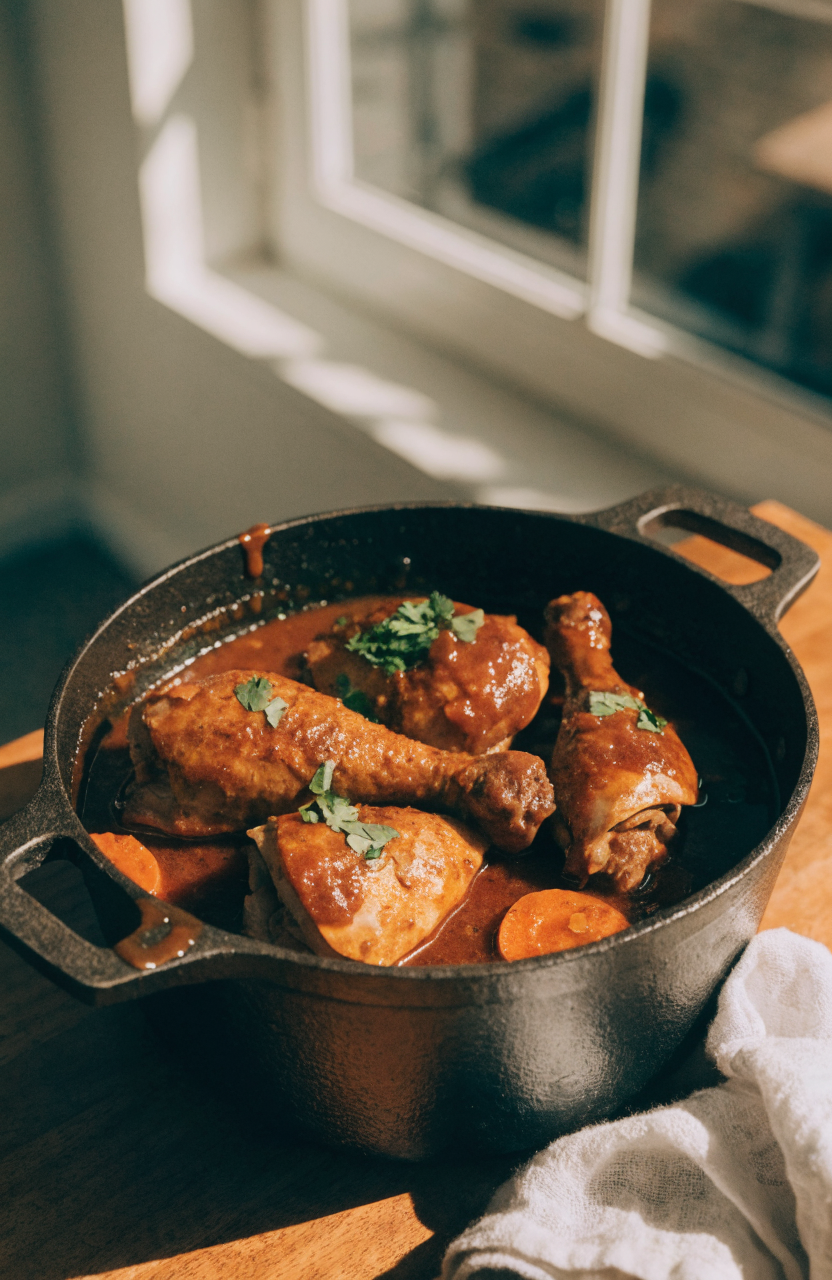
When I first set out to make brown stew chicken I wanted the sauce to cling to the pieces without becoming thin or greasy, and the meat to be tender but not falling-apart mush. Brown stew chicken is a classic braised Caribbean-style dish; in this version I focused on texture cues—how the skin crisps before braising, how the pan fond builds flavor, and how a cool butter finish tightens the sauce for shine.
Keep reading if you want step-by-step timing, clear doneness cues, and a version that works reliably on a stovetop or in a Dutch oven while remaining true to the brown stew chicken idea.
Why this brown stew chicken works
The key technique in this brown stew chicken is disciplined layering of heat and seasoning: a dry-brined, well-seared bird to create deep fond, a brief deglaze to capture those browned bits, and a controlled simmer so the sauce reduces and thickens without separating. I tested a few approaches—one where everything simmered from cold and another where I added starch at the end. The low-and-slow-from-cold method produced bland, watery sauce and grey meat; the quick sear then brief braise produced pronounced caramelized notes and clearly defined textures.
What changed during testing was the finishing move. At first I tried simply simmering until the sauce reduced. The sauce looked dull and sometimes greasy. Adding a small amount of cold butter at the end rounded the flavors, slightly thickened the sauce, and gave it a glossy, clingy texture that coats rice or dumplings well. For a dairy-free version, emulsify a neutral oil with a small cornstarch slurry and cook it briefly in the hot sauce so the starch activates and the glaze binds. That finishing technique is what makes the final brown stew chicken feel complete.
Key takeaways
- Sear first for flavor and texture; don’t crowd the pan.
- Short, controlled braise keeps dark meat tender without falling apart.
- Deglaze well and reduce the sauce to concentrate flavor.
- Finish with cold butter to bind the sauce and add gloss; use a cooked cornstarch slurry for a dairy-free finish.
Ingredients you’ll need and what to substitute
This brown stew chicken relies on a few texture-forward choices. I use bone-in, skin-on chicken thighs and drumsticks because dark meat resists drying and develops more depth during braising; skin adds crispness during the initial sear and contributes rendered fat for the sauce. Use a light brown sugar for deeper caramel notes and tomato paste for body without adding too much acidity. Scotch bonnet or habanero peppers are traditional in some Caribbean recipes; I use one small Scotch bonnet for aroma and remove the seeds if you want milder heat. If you prefer no heat, omit the hot pepper and add a pinch of smoked paprika instead.
Substitutions: If you only have boneless skinless thighs, decrease initial sear time by 1–2 minutes and shorten braise by 5–10 minutes; the texture will be softer and less saucy. For dairy-free finish, use 1 tablespoon neutral oil (like avocado) whisked with a cornstarch slurry and cooked briefly into the hot sauce instead of butter. If fresh thyme is unavailable, use 1 teaspoon dried thyme but add it earlier in the braise so the flavor develops.
Equipment
You only need a few sturdy tools: a 4- to 6-quart Dutch oven or heavy-bottomed pot for even heat and enough room to sear without overcrowding; a long-handled wooden spoon or spatula for deglazing; and a pair of tongs.
- 4–6 quart Dutch oven (or heavy-bottomed Dutch-style pot)
- Long-handled wooden spoon or spatula
- Tongs
How to make brown stew chicken
Prepare and season
Trim any large excess fat and pat the chicken dry with paper towels—this is important because moisture prevents good searing. Season the skin and cavity with 1 teaspoon kosher salt and 1/2 teaspoon black pepper and sprinkle with 1 tablespoon all-purpose flour; that small flour dusting helps deliver a darker crust while slightly thickening the sauce later. Let the pieces rest at room temperature for 15 minutes while you chop aromatics and warm the Dutch oven.
Sear and build fond
Heat the Dutch oven over medium-high until hot, then add 2 tablespoons vegetable oil. When the oil shimmers, work in batches so pieces are not crowded. Sear skin-side down until deep golden-brown and crisp, 4–6 minutes, then turn and brown the second side 2–3 minutes. Transfer seared pieces to a tray. The fond (dark browned bits) on the pot bottom is the flavor base—don’t scrub it away.
Saute aromatics and deglaze
Lower heat to medium and add 1 medium onion, chopped, and 2 medium carrots, sliced; cook, stirring, until softened, about 4 minutes. Add 3 cloves minced garlic, 1 tablespoon tomato paste, 1 small Scotch bonnet (whole or split—remove seeds for less heat), 1 teaspoon dried thyme (or 2 sprigs fresh), and 1/2 teaspoon allspice; cook 1 minute until fragrant. Sprinkle 1 tablespoon light brown sugar over the aromatics to help caramelize. Pour in 1 cup low-sodium chicken broth to deglaze, scraping the bottom with the spoon to lift all browned bits.
Braise
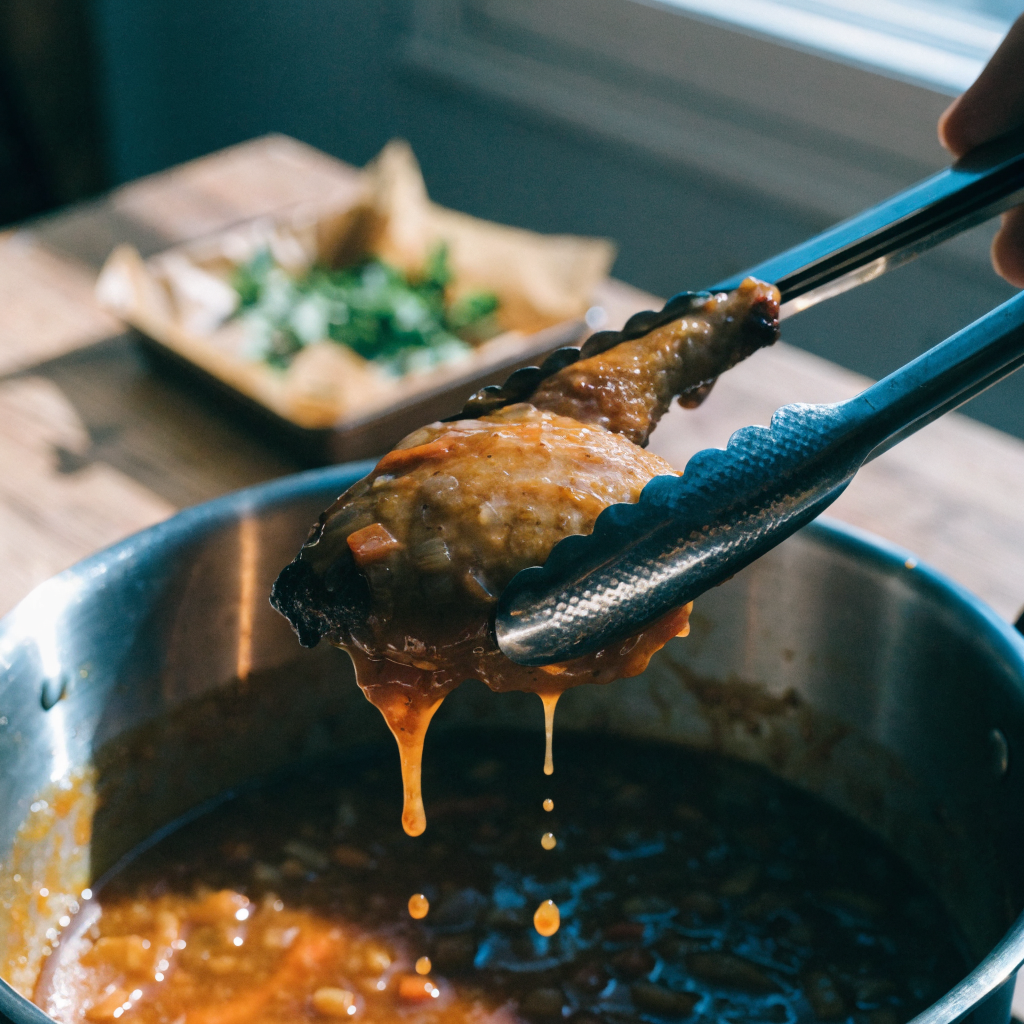
Return the chicken to the pot in a single layer, skin-side up. Add 1/2 cup canned crushed tomatoes and 1 tablespoon soy sauce for color and depth. Bring to a gentle simmer, then reduce heat to low and cover partially (lid slightly ajar) to let steam escape and concentrate the sauce. Braise gently for 30–35 minutes until the chicken registers 165°F near the bone and the meat is tender but not falling apart. Tilt one piece and look for sauce that coats the back of a spoon—this is the texture you want.
Finish and thicken
When the chicken is done, remove the pot from heat and fish out the Scotch bonnet and thyme stems. For a glossy glaze, whisk in 2 tablespoons cold unsalted butter one piece at a time until the sauce becomes glossy and slightly thicker; do this off the heat so the butter emulsifies gradually. For a dairy-free finish, whisk 1 tablespoon neutral oil with a cornstarch slurry (1 teaspoon cornstarch dissolved in 2 tablespoons cold water) and then stir that into the hot sauce; return the pot to low heat and simmer 1–2 minutes so the starch activates and the sauce thickens. Taste and adjust salt. Let the chicken rest in the sauce 5 minutes before serving so juices redistribute and the sauce clings.
Things I learned the hard way
- If you skip drying the skin, the chicken steams and never browns—always pat dry.
- Overcrowding the pan drops the temperature and yields pale, soft skin; sear in batches.
- Skipping the deglaze left the sauce thin and less flavorful; scraping the fond is essential.
- Simmering too rapidly separates the sauce and makes it greasy; keep the braise at a gentle simmer.
- Using boneless thighs with a long braise produced shredded meat and a flat sauce. Switching to bone-in cuts and a slightly shorter braise preserved texture.
- Adding cold butter at the end improved gloss without separating the sauce; add it cold and whisk quickly so it emulsifies into the sauce.
Variations to try
- Spicy island style: Keep the Scotch bonnet, include its seeds, and add 1/2 teaspoon smoked paprika; no other timing changes needed.
- Citrus-bright finish: Add 1 tablespoon lime juice to the sauce at the end and skip butter for a tangier glaze—add juice off-heat.
- One-pot rice: Brown the chicken and aromatics, then add 1 1/4 cups long-grain rice and 1 1/2 cups broth after searing; bring to a simmer, cover, and cook 18–20 minutes until rice is done (use a wider pot for even rice cooking).
- Stovetop-to-oven: After searing and deglazing, transfer to a 350°F oven covered for 25 minutes instead of braising on the stove; check internal temperature for doneness.
Storage, freezing, and reheating
Refrigerate leftover brown stew chicken in an airtight container for up to 3 days. Store pieces with sauce to prevent drying; sauce may thicken in the fridge—thin with a splash of broth when reheating. This dish freezes well: cool completely, portion with sauce into freezer-safe containers, and freeze up to 3 months. Thaw overnight in the refrigerator before reheating. Reheat gently on the stovetop over low heat until warmed through (about 8–12 minutes) to avoid overcooking the meat; you can finish with a small knob of cold butter off-heat to restore gloss.
What to serve with brown stew chicken
Classic pairings include steamed white rice or rice and peas to soak up the sauce, coconut rice for a sweeter contrast, or roasted plantains for texture contrast. For a lighter plate, serve with a crisp cabbage slaw tossed with lime and a touch of sugar to cut through the richness. A side of fried dumplings or boiled yams also matches the Caribbean tradition.
Stovetop Brown Stew Chicken with Glossy Braise
Ingredients
Equipment
Method
- Trim excess fat and pat the chicken dry with paper towels, then season all over with kosher salt and black pepper and dust evenly with 1 tablespoon flour; let rest 15 minutes at room temperature.
- Heat a 4–6 quart Dutch oven over medium-high and add 2 tablespoons vegetable oil; when shimmering, sear chicken skin-side down in batches until deep golden-brown, 4–6 minutes, then flip and brown 2–3 minutes; transfer to a tray.
- Reduce heat to medium, add chopped onion and sliced carrots to the pot and cook until softened, about 4 minutes; add garlic, tomato paste, Scotch bonnet, thyme, allspice, and brown sugar and cook 1 minute; pour in 1 cup chicken broth and scrape the pot bottom to deglaze.
- Return chicken to the pot skin-side up, add crushed tomatoes and soy sauce, bring to a gentle simmer, then reduce heat to low and cover partially; simmer gently for 30–35 minutes until the thickest part reads 165°F and meat is tender.
- Remove the Scotch bonnet and thyme stems, then off the heat whisk in 2 tablespoons cold butter until the sauce becomes glossy; alternatively for a dairy-free finish, whisk 1 tablespoon oil with a cornstarch slurry (1 teaspoon cornstarch dissolved in 2 tablespoons cold water), stir into the hot sauce, and simmer 1–2 minutes to activate the starch and thicken.
- Let the chicken rest 5 minutes in the sauce before serving and garnish with chopped cilantro or parsley if desired.
Notes
Frequently asked questions
Can I use boneless chicken for brown stew chicken? Yes, you can use boneless thighs, but they will cook faster and yield softer texture; reduce searing time by 1–2 minutes per side and shorten the braise by 5–10 minutes.
How do I keep the sauce from becoming greasy? Maintain a gentle simmer and avoid rapid rolling bubbles that can break the emulsified sauce; skim excess fat after searing and add the cold butter at the end to help emulsify and bind fats into the sauce.
Do I need to remove the Scotch bonnet pepper? I remove the whole pepper after braising to leave aroma and mild heat without unpredictable bursts; if you want more heat, split it and leave seeds in during cooking.
Can I make this in the oven? Yes—after deglazing return the chicken to the pot, cover, and bake at 350°F for 25–35 minutes until the internal temperature reaches 165°F and the meat is tender.
Is this dish freezer-friendly? Yes—freeze cooled portions with sauce in airtight containers for up to 3 months and thaw overnight in the refrigerator before reheating slowly on the stovetop.
How do I know when the chicken is done? Use an instant-read thermometer—the thickest part near the bone should read 165°F. Also look for tender meat that yields to a fork but still holds shape; the sauce should coat the spoon without running off immediately.
Closing
Brown stew chicken is all about texture balance: crisped skin, clearly defined dark meat, and a glossy, clingy sauce. This method gives reliable visual and temperature cues so you can focus on the feel of the finished dish—and enjoy how the sauce hugs rice without sliding off. Serve with coconut rice and a simple cabbage slaw for contrast; leftovers reheat well and the sauce benefits from a quick skim and a small knob of cold butter to restore shine.


Leave a Reply