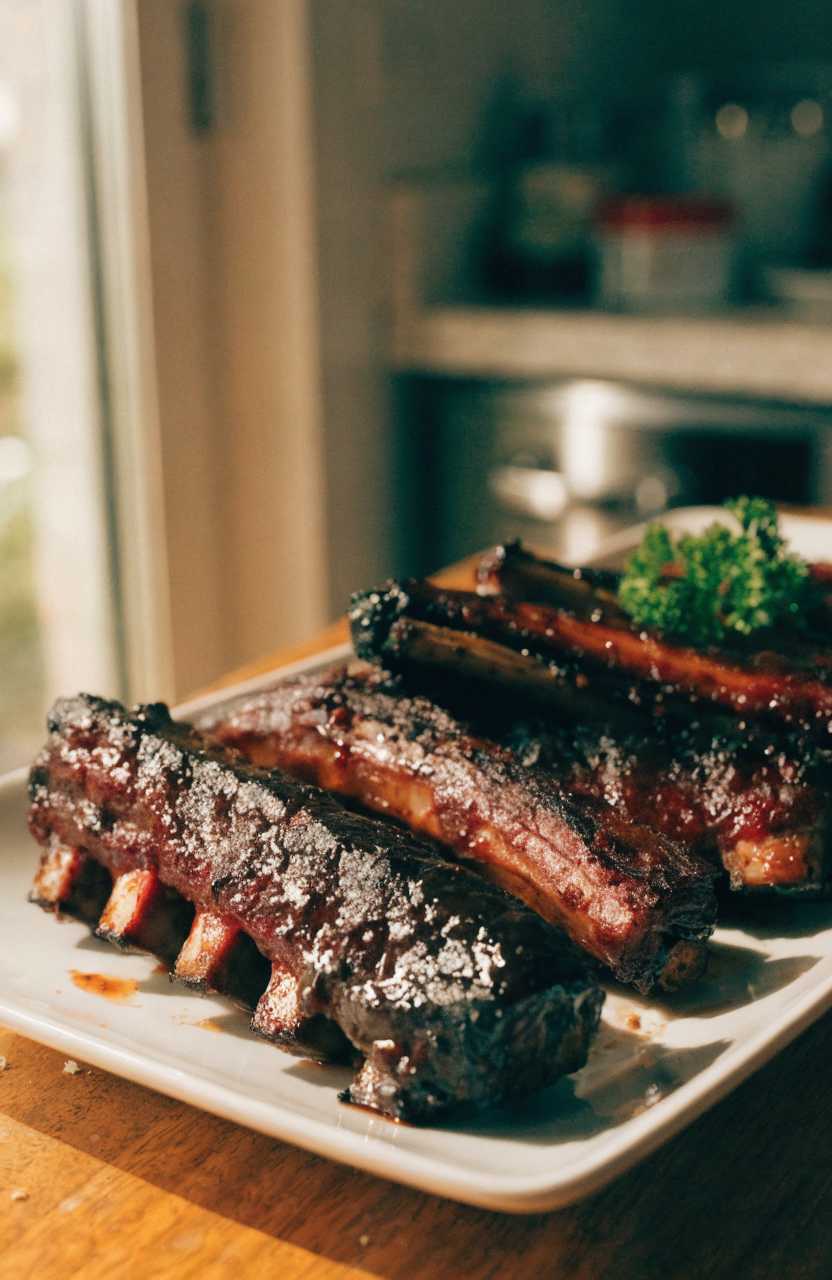
I remember the first time I tried to make ribs in my oven: the surface stayed pale and the inside was chewy. After several tests I settled on a method that reliably produces tender, textured meat with a sticky exterior—my oven baked barbecue ribs method. This oven baked barbecue ribs recipe shows exactly what you’ll make: beef short ribs slow-baked for tenderness, then finished hot so the sauce clings and caramelizes.
Why this oven baked barbecue ribs works
The key technique is low-and-slow braising in the oven followed by a short high-heat glaze. Slow cooking at 275°F for several hours breaks down collagen in beef short ribs into gelatin without drying the meat. During testing I found that finishing under higher heat (425°F for 10–15 minutes) or under the broiler for a few minutes creates a textured, sticky crust without overcooking the interior. I also use a tightly balanced dry rub-to-meat ratio (about 1 tablespoon dry rub per pound of ribs) and a concentrated sauce glaze that won’t dilute during baking. What changed during testing: my first version tried to cook at 325°F only and the sauce separated; switching to 275°F for most of the time and reserving glaze for the last 15 minutes kept the sauce glossy and the meat tender. This approach gives reliably tender, slightly pull-apart ribs with a defined crust—perfect for home cooks who want texture cues and temperature accuracy.
Key takeaways
- Low-and-slow at 275°F breaks down collagen for tender ribs.
- Apply glaze only at the end and finish at high heat for a sticky crust.
- Use beef short ribs and a 1 Tbsp-per-pound dry rub ratio for balanced flavor.
Ingredients you’ll need and what to substitute
I use bone-in beef short ribs (about 3 to 4 pounds) because their higher collagen content gives that unctuous, pull-apart texture when slowly cooked. The dry rub is a simple mix of brown sugar for caramel, smoked paprika for color and subtle smokiness, kosher salt for seasoning, garlic and onion powders for savory depth, and a pinch of cayenne for a mild heat. The glaze mixes tomato-based barbecue sauce with cider vinegar and a touch of molasses for shine and body. If you prefer, substitute beef short ribs with beef plate ribs or crosscut beef spare ribs—timing may vary slightly because thickness and bone type affect heat penetration. For a slightly lighter glaze, swap half the barbecue sauce for tomato paste diluted with a little water; this reduces added sugar but keeps thickness. If you need a budget option, use store-brand barbecue sauce and reduce molasses to 1 teaspoon to keep an even flavor balance.
Equipment
Essential items: a rimmed sheet pan or baking dish large enough for the ribs so they sit in a single layer, heavy-duty aluminum foil to seal for the braising stage, and an instant-read thermometer for accurate doneness checks. A 9×13-inch baking dish or a 12-inch rimmed sheet pan works well for 3–4 pounds of ribs; if your pan is too small the glaze can pool and the crust won’t form evenly. I often use a rimmed sheet pan lined with foil and a wire rack to let heat circulate—if you don’t have a rack, set the ribs directly on foil but tilt them slightly so juices collect away from the surface.
How to make oven baked barbecue ribs
1. Prep and dry rub
Preheat the oven to 275°F. Pat 3 to 4 pounds of beef short ribs dry with paper towels—dry surface meat browns and allows the rub to adhere. Mix the dry rub: 3 tablespoons packed brown sugar, 2 tablespoons kosher salt, 2 teaspoons smoked paprika, 1 teaspoon freshly ground black pepper, 1 teaspoon garlic powder, 1 teaspoon onion powder, and 1/4 to 1/2 teaspoon cayenne (to taste). Rub about 1 tablespoon of the mix per pound of ribs, making sure to coat all sides and in the crevices near the bone. Let the seasoned ribs rest at room temperature for 20 minutes if you have time; this helps the rub begin to penetrate.
2. Low-and-slow bake
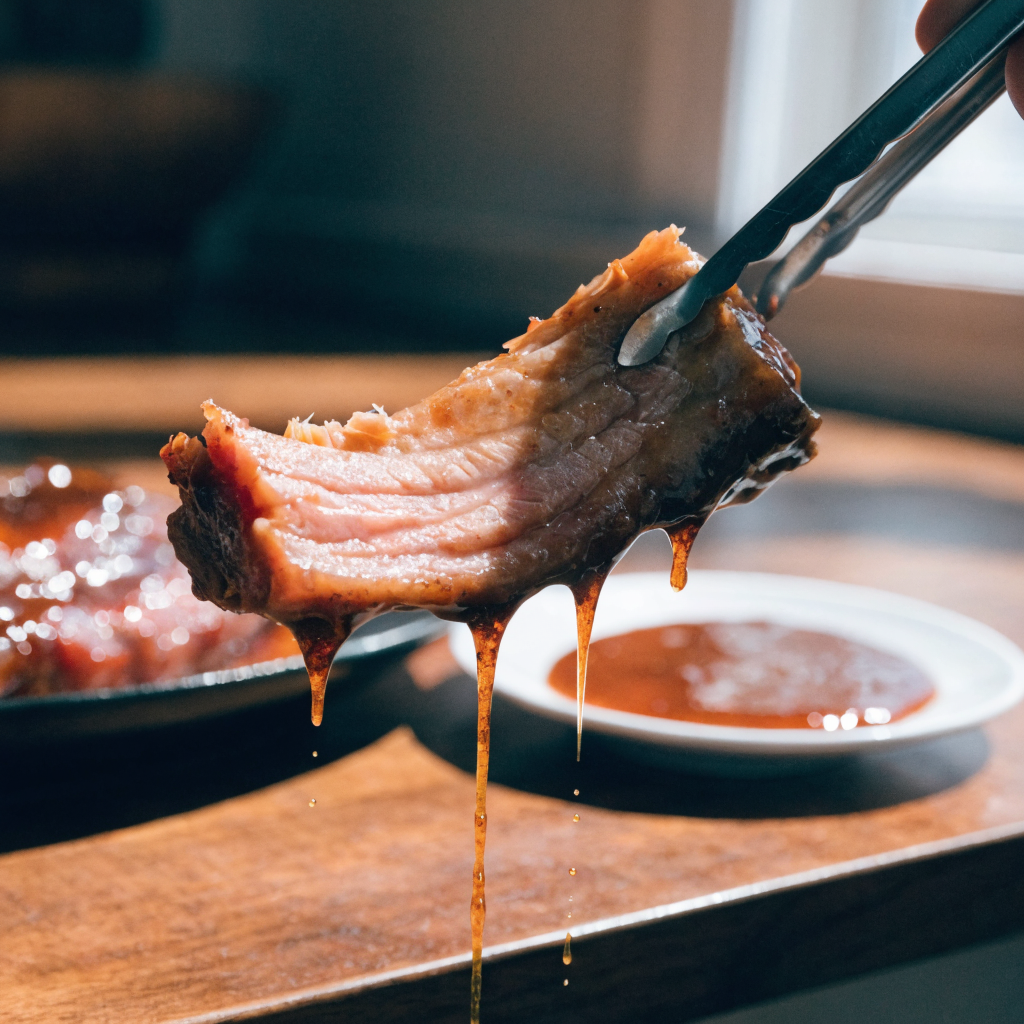
Arrange ribs bone-side down on a wire rack set over a rimmed sheet pan, or directly in a 9×13 baking dish. Add 1/2 cup beef broth (or water) to the pan—this prevents the pan from drying out and creates a humid environment that protects the meat. Tightly tent the ribs with foil, sealing the edges to trap steam. Bake at 275°F for 2 1/2 to 3 hours for 3 pounds, or 3 to 3 1/2 hours for 4 pounds. After about 2 hours start checking every 30 minutes: you’re looking for the meat to feel very tender when poked with a fork and to pull back from the bone edges by about 1/4 inch. An instant-read thermometer will read 195–203°F in the thickest meat for fall-apart texture.
3. Glaze and high-heat finish
When the ribs are tender, carefully remove foil and drain excess liquid from the pan. Increase oven temperature to 425°F (or set the broiler to medium-high for a quicker finish). Combine glaze: 1 cup barbecue sauce, 2 tablespoons cider vinegar, 1 tablespoon molasses, and 1 teaspoon Worcestershire sauce (optional). Brush a generous layer of glaze on all visible surfaces. Return the ribs to the oven, uncovered, for 10–15 minutes at 425°F, or place under the broiler 4–6 inches from the heat for 3–6 minutes—watch closely so the sugar in the glaze doesn’t burn. If you like a thicker crust, repeat glazing once more and return for an additional 3–5 minutes. The final appearance should be glossy, slightly sticky, and browned in spots.
4. Rest and serve
Let the ribs rest for 10 minutes after removing them from the oven; resting helps the juices redistribute and the glaze set. Slice between the bones or break into individual ribs. Serve hot with extra glaze on the side.
Things I learned the hard way
- Don’t glaze too early: applying sauce at the start creates a watery pan and prevents a sticky crust.
- Watch the broiler: sugars caramelize fast; keep the oven light on and the door cracked if you broil.
- Measure rub proportionally: about 1 tablespoon of rub per pound avoids over-salting or under-seasoning.
- Use a probe thermometer: texture cues can be subjective—195–203°F gives fall-apart ribs; lower temps feel chewy.
- First attempt mistake: I tried 325°F for the whole cook and the meat was dry; lowering to 275°F and adding a short high-heat finish solved it.
Variations to try
Honey-chipotle glaze: swap half the barbecue sauce for an equal amount of honey and add 1 teaspoon chipotle powder—finish time unchanged but expect a darker glaze. Asian-style ribs: replace the glaze with a mixture of hoisin (3/4 cup), soy sauce (2 tablespoons), rice vinegar (1 tablespoon), and grated ginger (1 teaspoon); reduce oven finish time under broiler by 1–2 minutes to avoid burning. Smoky coffee rub: add 1 tablespoon instant coffee to the dry rub and omit molasses in the glaze for a deeper, slightly bitter edge—same cooking times apply.
Storage, freezing, and reheating
Refrigerate leftover ribs in an airtight container for up to 4 days. To reheat, place ribs in a single layer in a baking dish, add 2–4 tablespoons beef broth, cover with foil, and warm at 300°F for 15–20 minutes until heated through. For crispy reheating, remove foil and finish at 425°F for 5 minutes. Ribs freeze well for up to 3 months: cool completely, wrap tightly in plastic wrap and foil, or freeze in a shallow airtight container. Thaw overnight in the refrigerator and reheat as above. Expect a slight loss of surface gloss; refresh with a thin brush of warmed glaze before serving.
What to serve with oven baked barbecue ribs
Pair these ribs with creamy coleslaw for crunch contrast, roasted fingerling potatoes for earthy texture, grilled corn on the cob for sweet char, or a simple green salad to cut richness. For a heartier meal, serve with buttery mashed potatoes or cheesy grits.
Oven Baked Barbecue Ribs (Melt-in-Your-Mouth Beef Short Ribs)
Ingredients
Equipment
Method
- Preheat oven to 275°F and line a rimmed sheet pan with foil; pat 3–4 pounds beef short ribs dry with paper towels.
- Mix the dry rub: combine brown sugar, kosher salt, smoked paprika, black pepper, garlic powder, onion powder, and cayenne.
- Rub about 1 tablespoon of the dry rub per pound of ribs, coating all sides; let rest at room temperature for 20 minutes if time allows.
- Arrange ribs bone-side down on a wire rack over the prepared pan (or directly in a 9×13 dish); pour 1/2 cup beef broth into the pan to maintain moisture and tent tightly with foil.
- Bake at 275°F for 2 1/2 to 3 1/2 hours depending on weight, checking after 2 hours; meat should pull back from bones slightly and feel tender when probed.
- Remove foil and drain excess liquid; increase oven to 425°F or preheat broiler to medium-high.
- Whisk together glaze ingredients and brush a generous layer over the ribs; return to oven uncovered for 10–15 minutes at 425°F or under the broiler for 3–6 minutes, watching closely to avoid burning.
- Optional: brush a second layer of glaze and return for 3–5 more minutes for a thicker crust.
- Let ribs rest 10 minutes, then slice between bones or serve whole with optional chopped parsley and extra barbecue sauce on the side.
Notes
Frequently asked questions
Can I use other ribs instead of beef? Yes—this recipe is written for beef short ribs; for spare ribs or other lighter rib cuts, reduce the low-and-slow time to about 2 to 2 1/2 hours at 275°F and still finish at high heat for glaze. Lighter cuts cook faster because they have less collagen to render.
How do I know when ribs are done and tender? Direct answer: the meat should pull back from the bone slightly and feel tender to a fork; internal temperature of 195–203°F indicates the collagen has rendered for fall-apart texture. Context: times vary by rib thickness—start checking at 2 1/2 hours for small racks.
Can I skip the high-heat finish? You can, but the final high-heat step creates the sticky textured crust; without it the glaze will be softer and less caramelized.
Is it okay to cook the ribs the night before? Yes. Cook through the low-and-slow stage, cool, refrigerate, and on the next day glaze and finish at high heat for best fresh texture and gloss.
Can I make these in a convection oven? Yes. Reduce the low-and-slow temperature by 15–20°F (set to about 255–260°F) and watch the finish more closely—convection speeds browning.
Closing
These oven baked barbecue ribs deliver the textured, pull-apart meat and sticky finish I aim for in my kitchen; the low-and-slow tenderness plus a quick high-heat glaze creates the exact combination of soft interior and textured crust I prefer. Enjoy them with a crisp side and a cold drink—don’t forget an instant-read thermometer to make texture reliable every time.

Leave a Reply